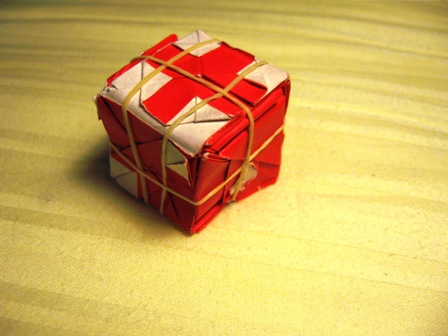
Alright, my dice is almost finished. just need to figure out how to form the 1...
Anyway, here's some tips : As I had said before, you just need to fold alongside the moutain and valley folds indicated in the CP and you should be able to fold it... with a lot of patience. Also, use large, thin paper as the dice becomes really small (like origamimasterjared said, 1/13 of your starting square) and the faces get really thick.

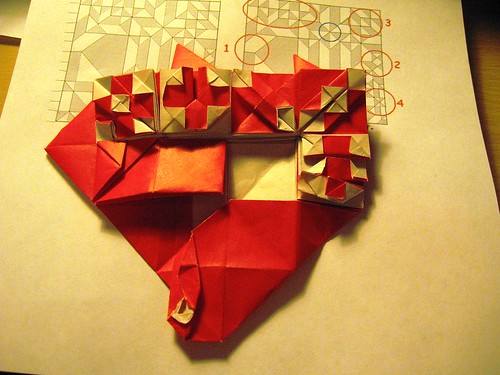
The numbers indicate the location of the dice faces are while the blue circles represent the two points sticking out of the model in the second picture of drbull's link. Hope this helps a lot. I'll post a picture of my dice when I finish it.
EDIT : I finally finished it! I know I didn't form the dice right, but I did my best. Pictures will be coming soon.