Marc Kirschenbaum - Fluffy the Teddy Bear
Forum rules
READ: The Origami Forum Rules & Regulations
-
- Newbie
- Posts: 3
- Joined: April 19th, 2004, 6:20 pm
Marc Kirschenbaum - Fluffy the Teddy Bear
Hi all!
I'm stuck !
Here's the diagram:
http://dev.origami.com/images_pdf/flufall.pdf
This is a complex one for me but I am determined to finish it. Has anyone made this model before? or planning to?
For now I'm stuck on step 39 where it says: "Pull out single layer from
underneath". But there's no single layer underneath! and if I try to pull something "underneath" the whole thing comes apart!
What am I doing wrong?
Hi there,
Yes, I have folded this model quite a few times, but I always think that the eye formation is hardest to do!
In step 39, you need to pull on the flap until it 'pops' out. Once you flatten it, it shoukd look like step 40. Essentially half of a fish base. I think that the layers will arrange themselves quite nicely during this manouver (sp?).
Hope that explains it!
saj
If you've found the forum useful, please consider making a donation.
-
- Moderator
- Posts: 1874
- Joined: May 17th, 2003, 1:01 pm
- Location: Germany
the top flap of the long topmost VERTICAL triangle runs top side underneath the little horizontal triangle. if you start pulling out that top flap, you will reverse the horizontal mountain fold (of the little triangle) to a valley fold and reverse the paper starting from this point.
hard to explain these things with words.
Christian
hard to explain these things with words.
Christian
Hope you succeed, it's one of my favorite models.
I'll just add a little tip about pulling out layers and color changes. I think the key to them (as to most complex folds) is to not be afraid to "unfold". For example, when you want to (open) sink something, you open the model a bit. The same thing with color changes - if everything "comes apart", well, it's really a bad thing. Just "trust in the paper" that it remembers where it was, make the necessary changes, and let it collapse again.
hi jasmine,jasmine wrote:hi i'm new here.
i´m definitely new in this forum - by the way: hello to everybody! great forum! - but since the fluffy is one of my favorite models, i´ll try helping you:
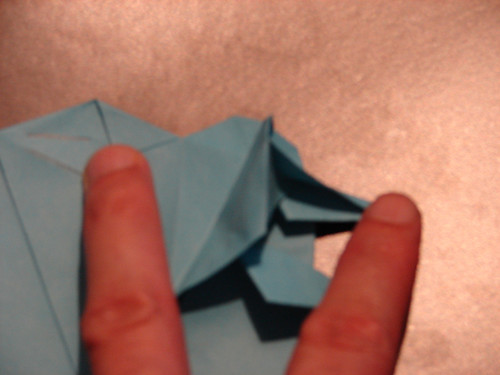
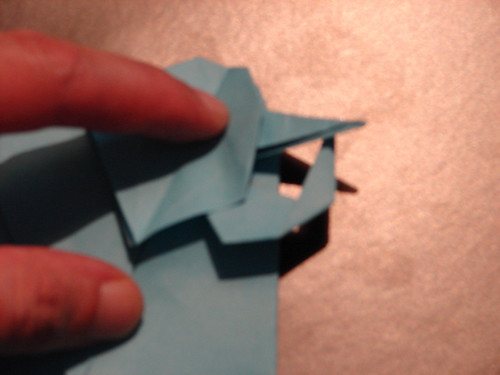
simply forget the "complicated" "combined" folds of step 31 - i´ve got also stuck at this point for some time. the easiest way to fold this is:
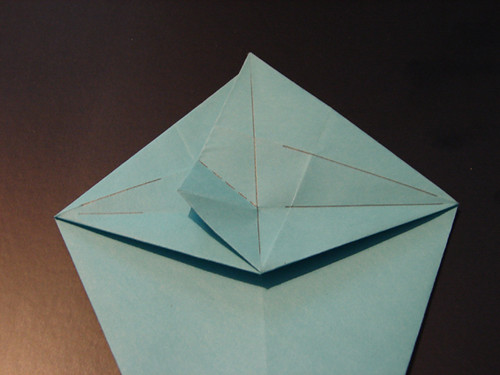
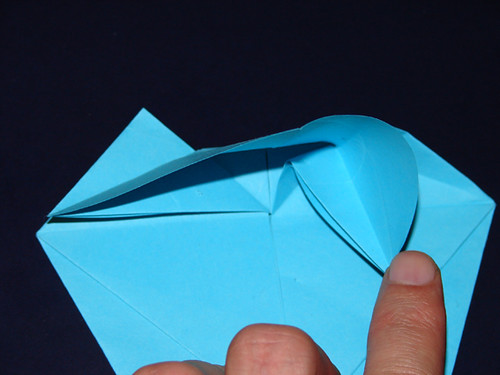
) fold the upper flap to the right, similar to step 27. forget in the meanwhile flap A
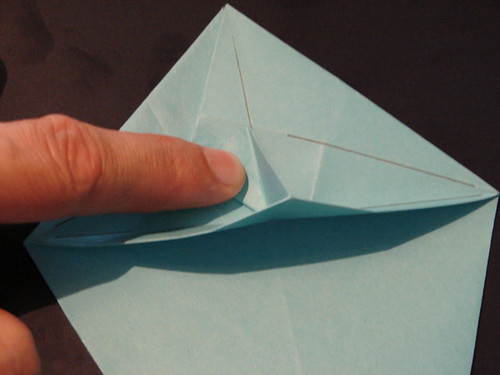
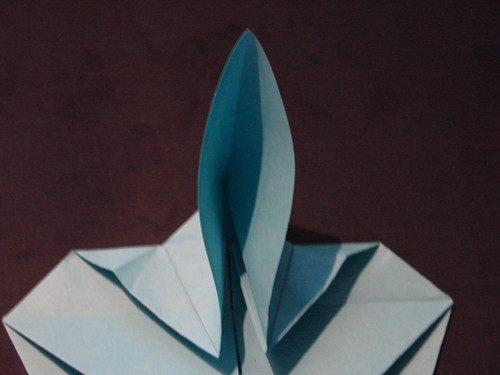
) then valley fold the flap, that you have folded to the right, in half, so that it looks like in step 32. start folding in half at the tip, moving to the center
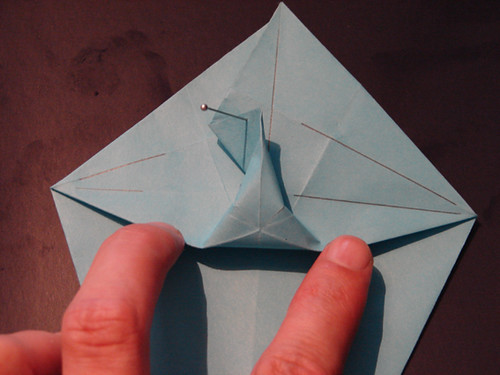
) you will see that the flap A will automatically move to the right = swing over.
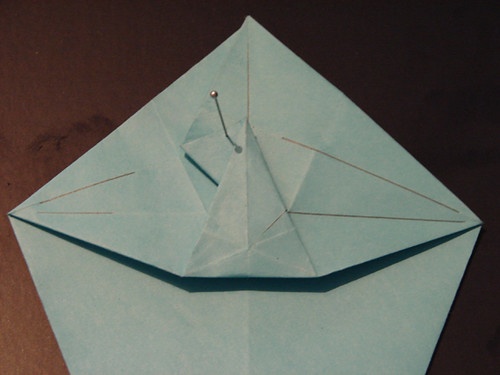
) you will have to flatten and arrange the paper a little bit and also the gusset will form automatically
but do not ask me how to perform step 55 (i solve this with open sinks) and step 63 (the best way to describe it in one word would result in "impossible" ...)
i hope this helps a little bit.
franz
-
- Moderator
- Posts: 1874
- Joined: May 17th, 2003, 1:01 pm
- Location: Germany
hello Franz, good to see you at the forum [img]http://www.freewebdesign.be/smileys/ima ... r/wave.gif[/img]
- bozozaclown
- Newbie
- Posts: 6
- Joined: April 6th, 2006, 3:35 am
- Location: FL
- Contact:
step 13:
just concentrate on the valley fold that starts from the middle to the left. valley fold in half as shown with the arrow. (just try to forget the mountain folds and the valley fold down to the right; these are results of the squash.) automatically the layer below will move upwards ... so that you have to squash it. the easiest way is, to press one finger on the tip of the triangle (shown in diagram 14) and pull the layer down ... the squashed triangle will be formed automatically.
step 19:
i perform it this way: lift up the upper layer. then valley fold the now visible right corner and the left corner down to the middle. then you can fold the upper layer on existing creases to the right, as shown in diagram 20.
franz
There is no flap underneath its more a case of pulling only the top layer out while leaving everything else in place, while this isnt much help looking at step 40 at least tells you what it should look like when its done... definately one of those eureka moments... this method is used a lot in langs insect origami but that probably isnt much help (looking for a easier model which also features this fold now).
I'm new and I'm feeling dumb
I've been trying to figure this out on my own for awhile and I just can't get past step 10 I can fold up to step 10 fine but have been stuck on step 10 and I can't seem to figure it out. I might be messing up on step 9 but it doesn't seem to be the case. I was wondering of there is a video or picture out there that could help me. Or if someone could help me with the instructions more that would be great. I see that everyone else is getting stuck on step 30 and above, me not so much. I just can't get my model to match up with the final fold on steps 10 to 11.
- unknownfolder
- Super Member
- Posts: 174
- Joined: May 23rd, 2008, 3:12 pm
- Location: United States