This model is found in the Tanteidan magazine #94.
I seem to have an okay time folding until I get to around step 48. The legs and feet seem really difficult to accomplish- so many layers of paper! Would anyone have any tips or are there any videos on the internet displaying these complicated steps? I've looked ahead in the diagram and it seems that if I can make it to step 67 I'll be good to go for the rest of the model.
Has anyone had any success with this one?
This one is particularly tough because I do not understand the diagrammed language![url][/url]
Kyohei Katsuta - Duck
Forum rules
READ: The Origami Forum Rules & Regulations
READ: The Origami Forum Rules & Regulations

Time to brush off the dust from the magazine box!
Just to avoid any sort of confusion, I'm going to back up to step 41, when the model starts focusing on the legs/feet. I should also admit that I don't understand a word of the Japanese instructions either.
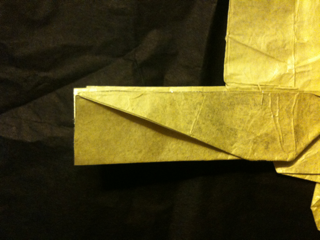
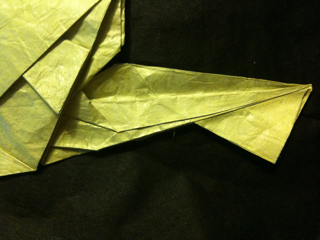
Here's what your model should look like starting step 41:
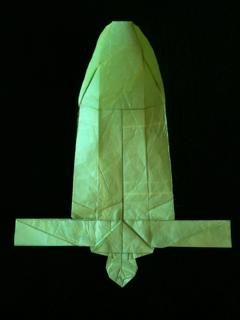
42-44 are fairly self explanatory, they're just precreases. Step 44's reference point is splitting the angle between 42 and 43. You need to do these creases on both front and back of the leg.
45-46 are just reverse folds... Make sure you reverse step 46 with the crease you made in 44 though, not the crease from 42. (The point will go down farther with the right fold.)
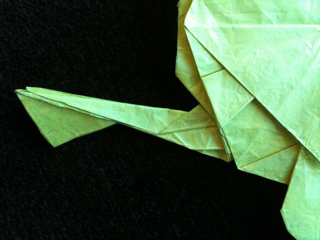
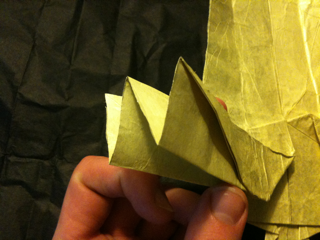
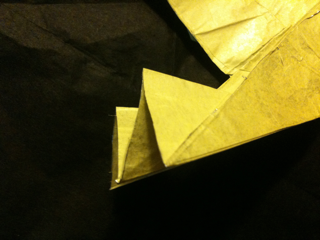
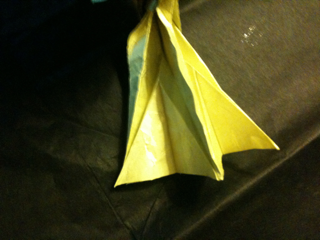
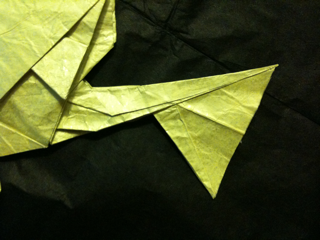
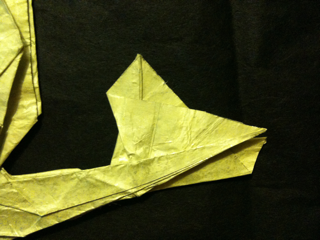
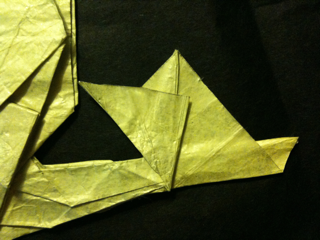
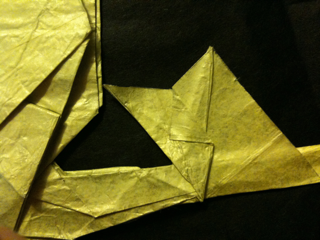
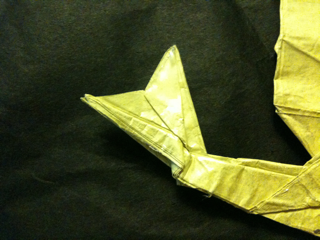
47 is a trickier step. My suggestion is to find the leftmost crease, then fold the leg flap in half, then mash the triangle down. Here's a small photo progression:
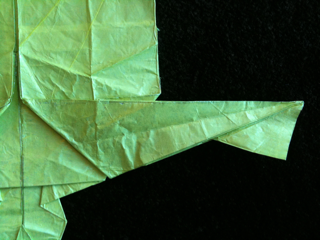
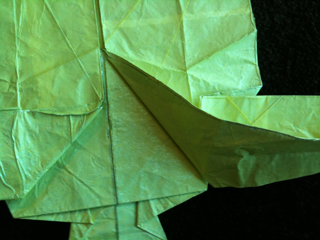
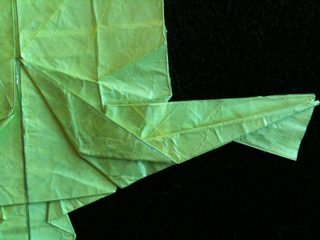
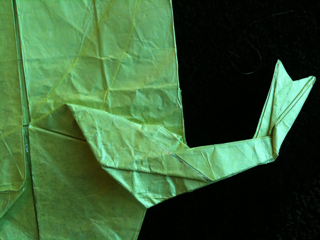
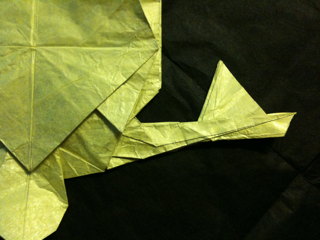
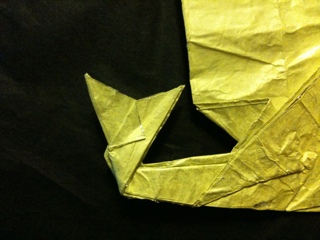
48 ) Folding down the back half of the leg flap. The reference for the back point that I used was a crease already back there... Here's the front and back after the fold:

49) Repeat on the other leg.
50) Flip the model around.
51) Lift up the first flap of paper.
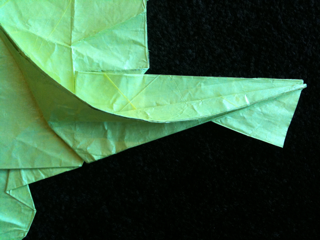
52) Put said flap behind a couple flaps of paper. (The right side of the photo)
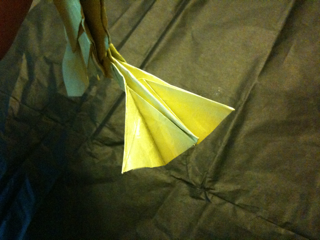
If you spread out the foot now, it would look like this:

53 through 61 are just simple and reverse folds. 60 is to repeat behind.
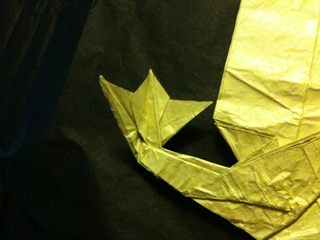
61) Spread out the foot. It will not be flat.
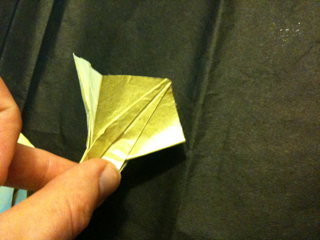
62) This is where you make it flat. Don't pay too much attention to the mountain fold line on the diagrams, I scratched my head over that for far too long. Just make the foot look like step 63, making it flat.
The reference point in step 65 is not there, the diagrams are drawn slightly wrong. Just use your eye and make the fold where you think it should be. (Just make sure it's parallel.) Repeat all this on the other foot, and you'll be good to go at step 67!
I only folded one of the feet, so if you need help on specific steps, let me know and I'll get you some good photos of your problem spots. Have fun!
Just to avoid any sort of confusion, I'm going to back up to step 41, when the model starts focusing on the legs/feet. I should also admit that I don't understand a word of the Japanese instructions either.
Here's what your model should look like starting step 41:
42-44 are fairly self explanatory, they're just precreases. Step 44's reference point is splitting the angle between 42 and 43. You need to do these creases on both front and back of the leg.
45-46 are just reverse folds... Make sure you reverse step 46 with the crease you made in 44 though, not the crease from 42. (The point will go down farther with the right fold.)
47 is a trickier step. My suggestion is to find the leftmost crease, then fold the leg flap in half, then mash the triangle down. Here's a small photo progression:
48 ) Folding down the back half of the leg flap. The reference for the back point that I used was a crease already back there... Here's the front and back after the fold:
49) Repeat on the other leg.
50) Flip the model around.
51) Lift up the first flap of paper.
52) Put said flap behind a couple flaps of paper. (The right side of the photo)
If you spread out the foot now, it would look like this:
53 through 61 are just simple and reverse folds. 60 is to repeat behind.
61) Spread out the foot. It will not be flat.
62) This is where you make it flat. Don't pay too much attention to the mountain fold line on the diagrams, I scratched my head over that for far too long. Just make the foot look like step 63, making it flat.
The reference point in step 65 is not there, the diagrams are drawn slightly wrong. Just use your eye and make the fold where you think it should be. (Just make sure it's parallel.) Repeat all this on the other foot, and you'll be good to go at step 67!
I only folded one of the feet, so if you need help on specific steps, let me know and I'll get you some good photos of your problem spots. Have fun!
Last edited by oz on May 28th, 2011, 8:23 am, edited 2 times in total.
Wow! Those explanations are amazing! I can't wait to try those folds with the walk-though. However, seeing the pictures is making me think that there might be something else that I'm doing wrong...
I was wondering if the type of paper that I'm using would be causing me problems. I use regular copy paper as my practice folding paper (I like to recycle my school notes). What type of paper and what size did you use? Does it seem like a type of model that can be folded successfully with copy paper-type material?
Thanks again for all your help!
I think the duck should be able to be folded pretty nicely from copy-paper-like material. If you want to make a lasting display-quality model, it looks like it would wet-fold pretty well.
I'm going overboard with the paper... I'm using a fifteen inch square of tissue foil. I had just wanted a large model to help show the steps a little clearer.
If you need any more help, just ask!
I'm going overboard with the paper... I'm using a fifteen inch square of tissue foil. I had just wanted a large model to help show the steps a little clearer.
If you need any more help, just ask!
I'm having trouble with these steps53 through 61 are just simple and reverse folds.
My "foot triangle" never looks as good as it's shown in step 57 and everything just looks like a mangled mess by step 62.
I do feel as if I'm making progress though!! The foot matches your pictures until that problem spot.
Okay, let's walk you through the foot triangle from the beginning.
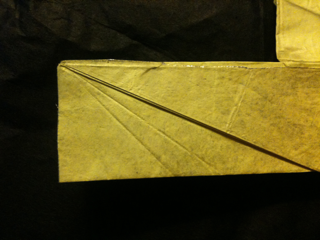
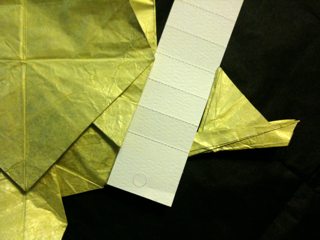
I'm backing up to 42. Here it is flat and with the end spread, just to make sure you have the right number of flaps and all that good stuff.
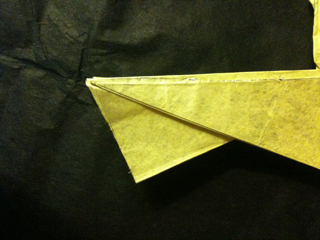
42-44 is just precreasing, your model will now have three nice neat lines like this (the third hidden under the flap's shadow).
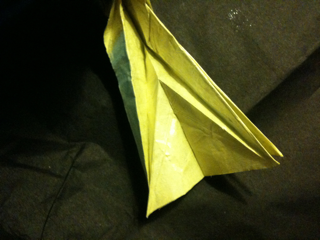
45) Reverse fold the two flaps, sticking them up through the model.
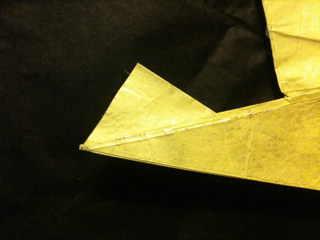
46) Reverse fold the two flaps again, but use the second crease. It will not be flush with the top (as shown in the second picture).
47-50) Above. Make sure to flip the model over.
51) I screwed up my previous directions. The above directions say to put the flap behind the new first flap... This is wrong. It'll be two flaps behind, but my pictures will speak better than I can:
I will change the above post too so nobody else gets confused. My apologies again.
53) Take the middle flap or toe of the foot and reverse fold it.
Before:
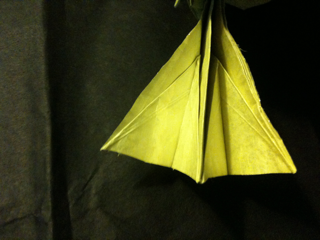
This is the bottom of the foot. Spread the flaps evenly.
Then, just fold down the flap, turning the foot into a little triangle.
54) Reverse fold this flap again, leaving a little wedge on the right side of the triangle. It doesn't extremely matter, but try to make the left side of the triangle parallel with the middle layer of the body (which is what step 55 is trying to say).
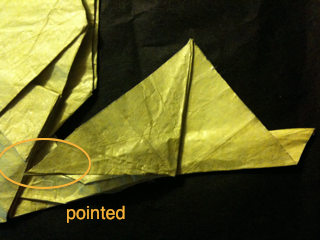
56) Fold the top flap over, bringing the swung corner to a point.
57) Fold it over. No special tricks here.
58: Same thing, just fold it over. Try to line up the top edges.
59) Again, just a simple fold. This locks the toe into place, so it might be handy to crease this one really well and not unfold it.
60) Repeat on the backside.
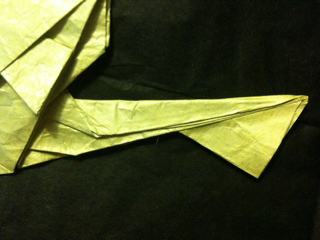
61-62) Fold the closest part of the foot towards you. (Sorry, I flipped my model over taking the pictures.)
63) Repeat.
Hopefully this works for you! Let me know if you're still confused about something.
Moderators, do I win anything for the world's longest post?
I'm backing up to 42. Here it is flat and with the end spread, just to make sure you have the right number of flaps and all that good stuff.
42-44 is just precreasing, your model will now have three nice neat lines like this (the third hidden under the flap's shadow).
45) Reverse fold the two flaps, sticking them up through the model.
46) Reverse fold the two flaps again, but use the second crease. It will not be flush with the top (as shown in the second picture).
47-50) Above. Make sure to flip the model over.
51)
I will change the above post too so nobody else gets confused. My apologies again.
53) Take the middle flap or toe of the foot and reverse fold it.
Before:
This is the bottom of the foot. Spread the flaps evenly.
Then, just fold down the flap, turning the foot into a little triangle.
54) Reverse fold this flap again, leaving a little wedge on the right side of the triangle. It doesn't extremely matter, but try to make the left side of the triangle parallel with the middle layer of the body (which is what step 55 is trying to say).
56) Fold the top flap over, bringing the swung corner to a point.
57) Fold it over. No special tricks here.
58: Same thing, just fold it over. Try to line up the top edges.
59) Again, just a simple fold. This locks the toe into place, so it might be handy to crease this one really well and not unfold it.
60) Repeat on the backside.
61-62) Fold the closest part of the foot towards you. (Sorry, I flipped my model over taking the pictures.)
63) Repeat.
Hopefully this works for you! Let me know if you're still confused about something.
Moderators, do I win anything for the world's longest post?
Last edited by oz on May 28th, 2011, 8:27 am, edited 1 time in total.

So I completed my first attempt going all the way through the model. It looks REALLY funny but at least still recognizable as a duck. The feet are a little big big compared to the rest of the model (clown duck!). I'm sure that if I keep perfecting my folds that I'll get it better eventually.
One step that I found I was confused with (not really sure if I did it correctly) was the last step; #80. It looks like some of the inside flaps have to be freed from the inside of the model or something.
I can't wait to get this fold good enough to make to give away as a gift! I'm so glad that I have pretty much all the preliminaries in place.
Re: Kyohei Katsuta - Duck
So, here I am in April of 2024 folding this duck! I, too, was having problems understanding the folding of the feet, and this post was invaluable! Thank you to oz (are you still around?) for the amazing work you did explaining this!
Re: Kyohei Katsuta - Duck
I'm glad it helped! 
Also, thanks for the reply! I haven't visited this forum in a (long) while, until the other day when I got an email notification, so thank YOU for bringing me back!
Also, thanks for the reply! I haven't visited this forum in a (long) while, until the other day when I got an email notification, so thank YOU for bringing me back!