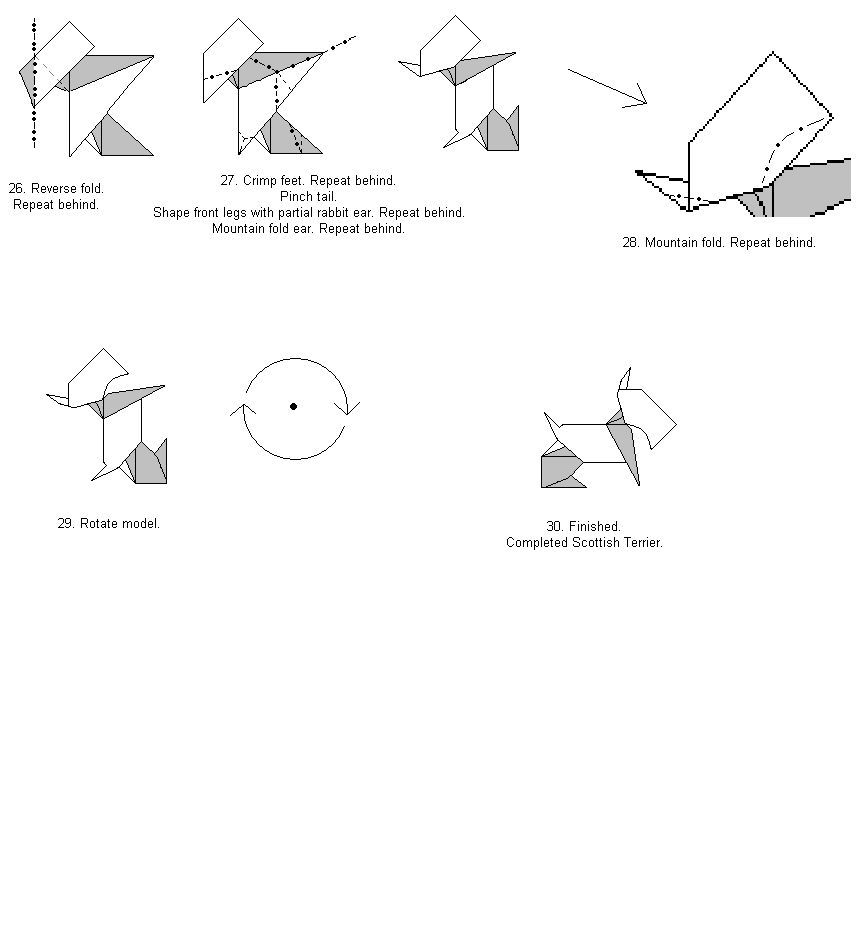
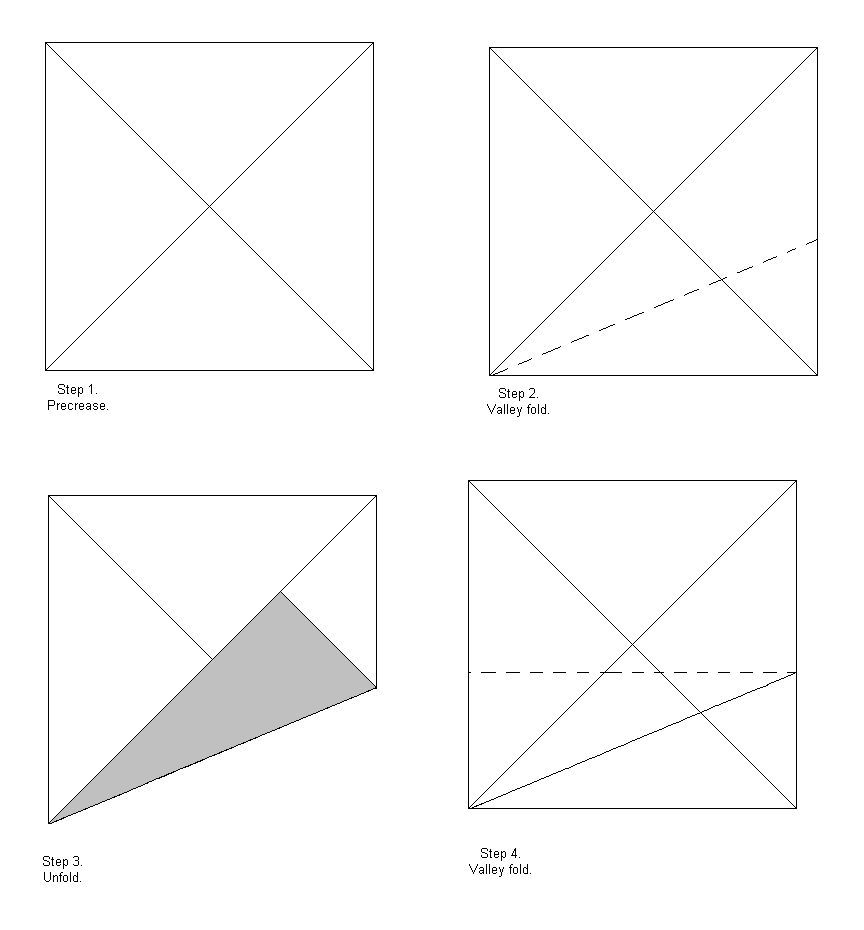
First of all, I would like to say very nice! The model itself is good, considering dollar bills are not the easiest paper to work with and the crease pattern is a bonus that most diagrams don't include. Suggestions for improvement in the diagramming would be to include directional arrows for the folds and redraw step 28 so as to remove the aliasing artifacts caused by the zoom.
I am willing to assist with the revisions I have suggested, although I'll tell you right now, I am not a diagramming guru by any means.
Thank you for the input. Do the instructions seem clear even with the lack of arrows? Has anyone tried it yet? Also I wanted to make sure it was original, are there uncanny similarities to other works?
Do you have any other models of yours off the ones listed on your site gallery? They look very good, so if you have some of your design, I would encourage you to diagram them, too
Finally, i don't have a dollar banknote to compare... what is the ratio of the sides of the rectangle that i'd have to use, if i used other paper?
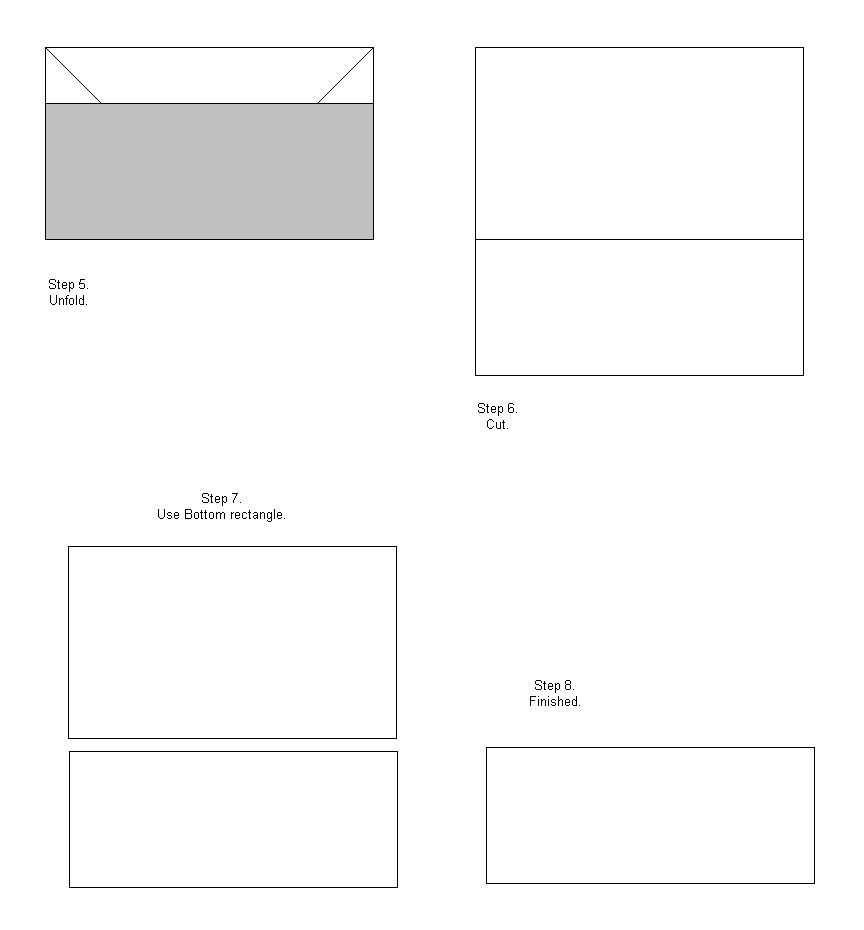
The usual approximation given for a dollar bill is a 3 by 7 rectangle. Or... assuming that you are outside of North America, you probably have access to A4 paper. Cut a square from A4, and the leftover rectangle is approximately dollar bill shaped. The bonus with this method is that you can use the square to fold something else!
I am told that neither of these approximations is exact, but some time ago I tried to track down exactly what the proportions of a dollar bill actually are, and never managed to find a definitive answer. Even the US Treasury doesn't seem to know...
I've tryed many times to get a good dollar bill size rectangle but it never came out right! So thanks for posting this! Also very cool dog, I also love how you showed the cp of your model because most diagrams don't do that, and it helps! The only thing is (and this has already been said) that there are no arrows, but besides that it's great! Keep it up!
Funkee Folder
You can make one of those swan thingys! Wow!
-----------------------
Quote from one of the many people who mistook a crane for a swan. Don't you just love em'!
Your most welcome.
I appreciate your appreciation.
One of the reasons I put the cp there is, for those who would like the choice of having more challenge, like a riddle. Then, if needed the instructions are there. I think it might also help to inspire other would-be designers to try other ideas with the base.
As for the arrows, please try the model & let me know if the diagrams suffer without them. If it is clear enough without arrows I'll leave them out. If they add to clarity instead of clutter I'll want to add them.
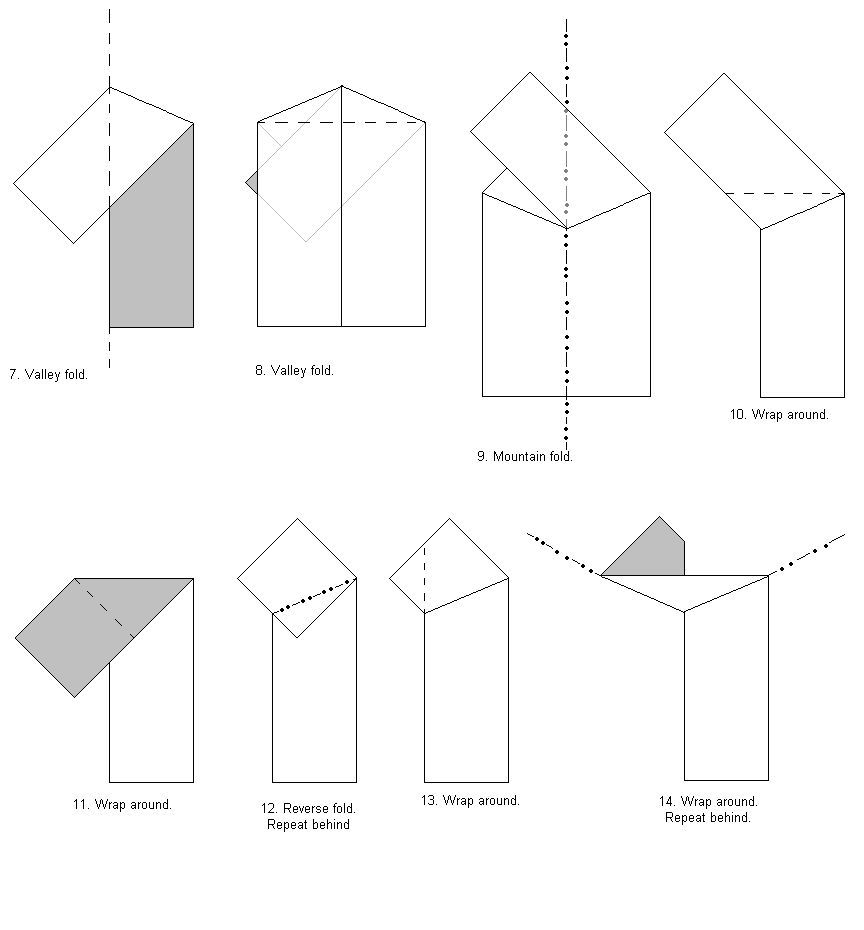
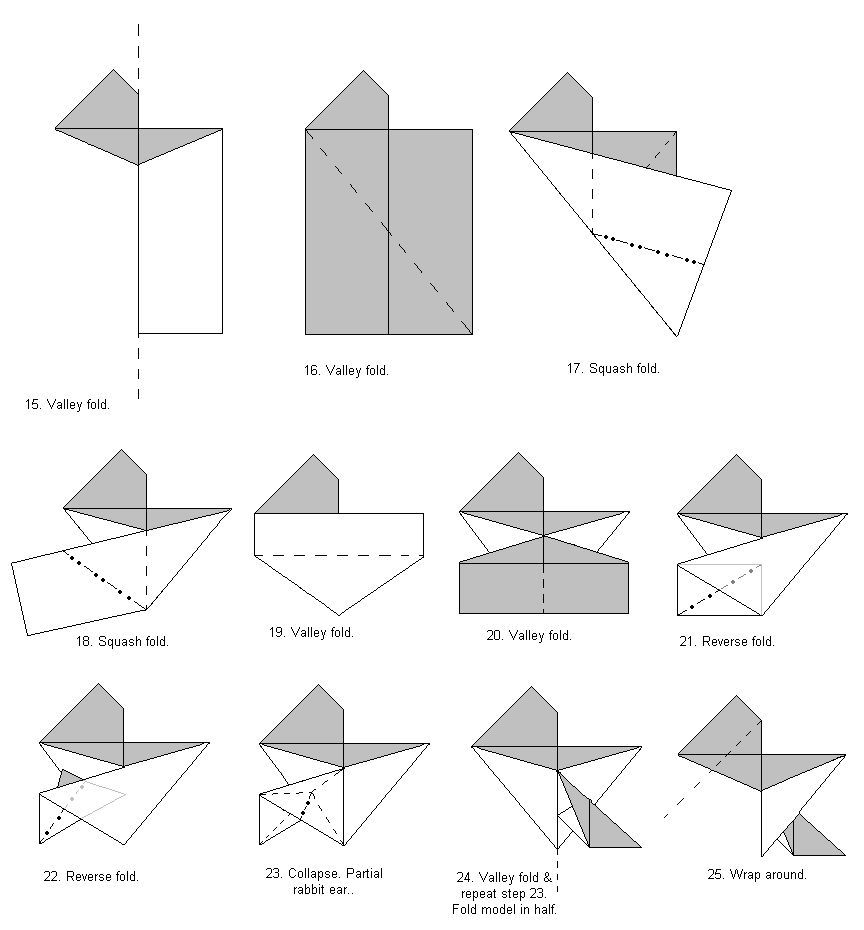
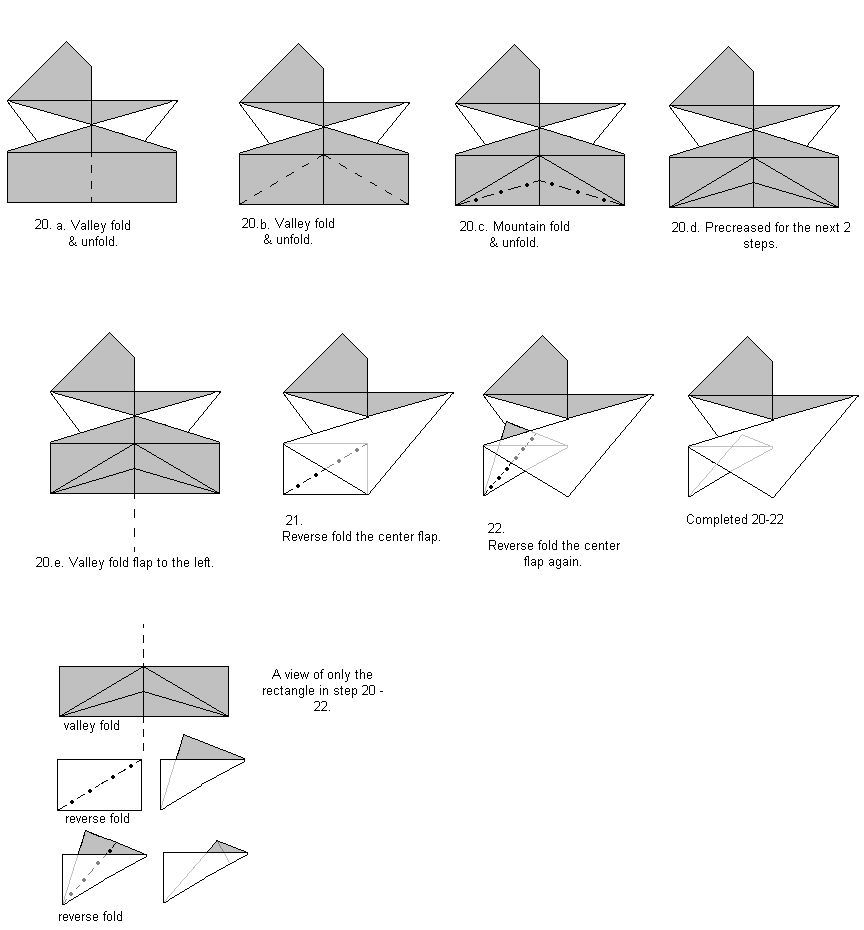
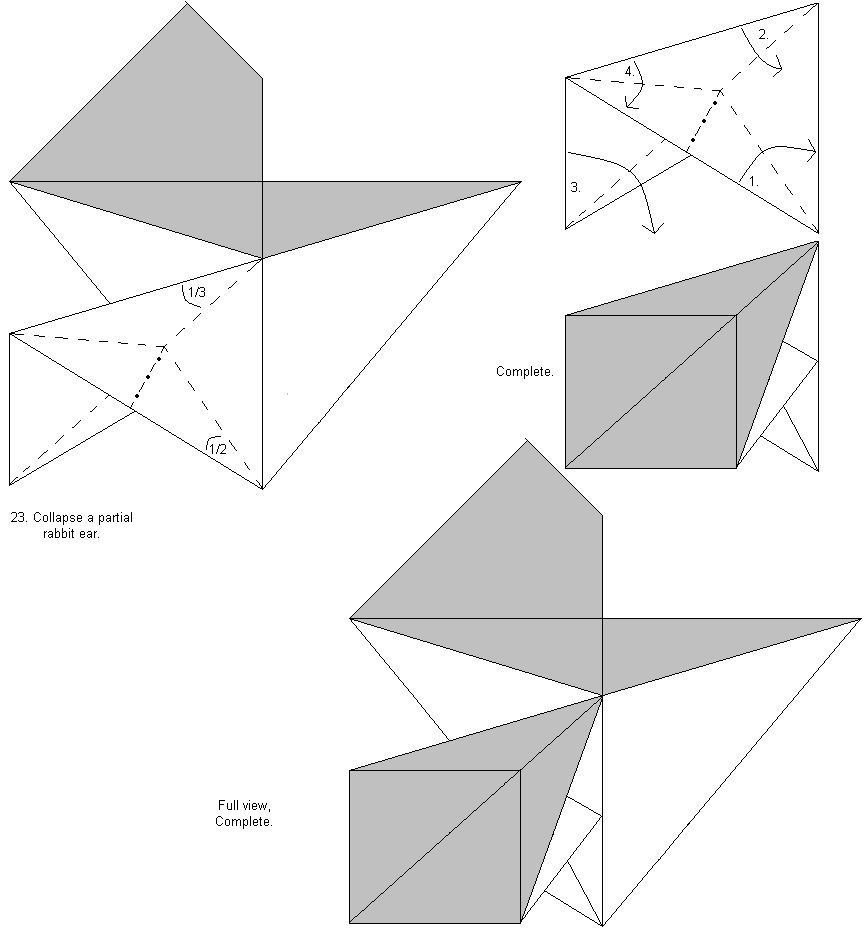
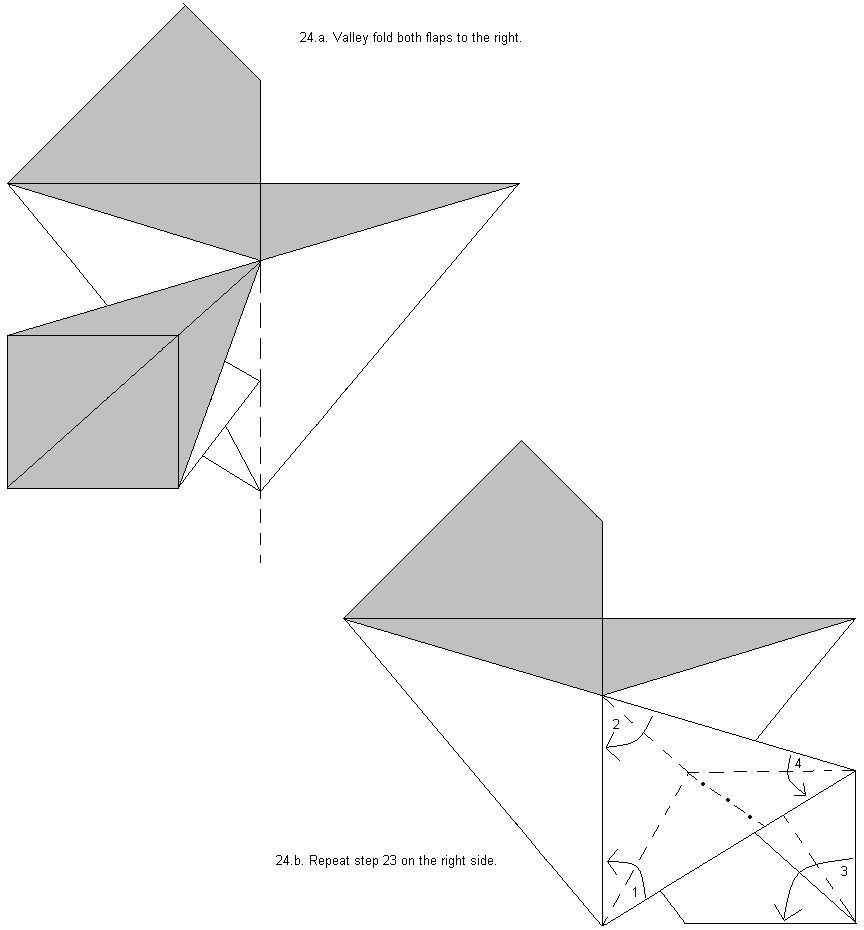
I have folded your scottish terrier and this is what I found! The process is pretty straight forward except around steps 21 thru 24. Here it would better to show both flaps so they can see that you reverse fold both at the same time (I hope I'm right about that ) and also on step 24 I think I did it wrong because instead of two triangular flaps I some how got two thin flaps! Maybe it would help to show seperate flaps here too. (Also could you help me on step 24 so I can get a scottish terrier that has those triangular flaps!) All around the model is short but sweet I think you did a good job! Oh and those arrows could be left out though for someone like me who is used to them it was a nice change (and sorta of a challenge!) So keep it up and if you make any new models post it so we can see!
Happy Folding
Funkee Folder
You can make one of those swan thingys! Wow!
-----------------------
Quote from one of the many people who mistook a crane for a swan. Don't you just love em'!
Very nice! That was a good idea to show progressive folding diagrams for the legs! I redid it and this time it came out right. Oh and I was looking at your site and I must say that the origami film is very cool!
Funkee Folder
You can make one of those swan thingys! Wow!
-----------------------
Quote from one of the many people who mistook a crane for a swan. Don't you just love em'!