
Also, just to keep the forum nice and clean, instead of posting twice in a row, go ahead and use the edit button on the top right of your post. Not only does it make the forum neater, it keeps certain moderators off your back!
Marc Kirschenbaum - Biplane II
Forum rules
READ: The Origami Forum Rules & Regulations
READ: The Origami Forum Rules & Regulations
For step 37, fold or pinch along the mountain fold running along the middle of the triangle. You're going to pull on this, making the triangle 3D, and creating a squashed section on the bottom of the triangle, which will collapse on the other two mountain folds. The bottom two corners of the triangle will come together, and the middle mountain fold will wind up being the new bottom, sticking out the bottom of the model as shown in step 38. Note that this only has to be done on the right side (behind as well); not on the left side.
Also, just to keep the forum nice and clean, instead of posting twice in a row, go ahead and use the edit button on the top right of your post. Not only does it make the forum neater, it keeps certain moderators off your back!
Also, just to keep the forum nice and clean, instead of posting twice in a row, go ahead and use the edit button on the top right of your post. Not only does it make the forum neater, it keeps certain moderators off your back!

On step 44, don't worry about precreasing the mountain fold. Just fold along the valley fold in it's entirety, opening up the model slightly. Once the valley fold is complete, just fold over the flap on the left so that it looks like step 45. (You'll have to make a new crease for the mountain fold, it's not been precreased.) Let me know if you're still having trouble with the step, I can take a couple pictures for you.
Steps 70-72
I can't get those at all. What am I supposed to do? What's the difference between the picture in step 70 and in step 73? They look the same... What happens if I just skip these steps?
OK, I got it in the end. It's about making the wing straight. Not very clear, the diagram, is it?
OK, I got it in the end. It's about making the wing straight. Not very clear, the diagram, is it?
Re: Marc Kirschenbaum - Biplane II
How do you do step 63? What does it mean when they say "swivel down hidden middle layer into pocket"?
-
mixmastermarc16

- Super Member
- Posts: 219
- Joined: March 1st, 2011, 11:16 pm
- Location: Maryland, USA
Re: Marc Kirschenbaum - Biplane II
swivel fold hidden flap
Re: Marc Kirschenbaum - Biplane II
picture would help? sry for inconvenience caused...
Re: Marc Kirschenbaum - Biplane II
gave up a while ago, but now trying again. Still stuck on steps in the 50s or so. Anybody can provide picture/video or something because descriptions didn't help too much I am pretty sure I am doing it wrong.
Re: Marc Kirschenbaum - Biplane II
What steps specifically are giving you trouble? Where are you stuck?
Re: Marc Kirschenbaum - Biplane II
I can somewhat follow the diagrams up to step 59, however because of my failure to complete this I question if I am doing it correctly from 51 and somewhat question if I did step 48 correctly (though I think this PROBABLY should be right)
Re: Marc Kirschenbaum - Biplane II
**EDIT**
I updated the photos with a model you can see better from (except for step 51, I was past that when I realized I forgot them, and didn't want to unfold the model).
********
Cool...we'll work our way from 51 then. I apologize in advance for my crappy photos, please let me know if you need me to take them again with better lighting.
Step 51 is wrapping a single layer from behind the little leg there to the front, like this:
Step 52 creates an extra flap from the middle of the paper, like this:
Step 53 folds the top two flaps over, and like it says, the model won't lie flat.
Step 54 is simply swiveling the bottom layer out from underneath. it won't lie flat, and don't reverse the direction, just let it hang there like this:
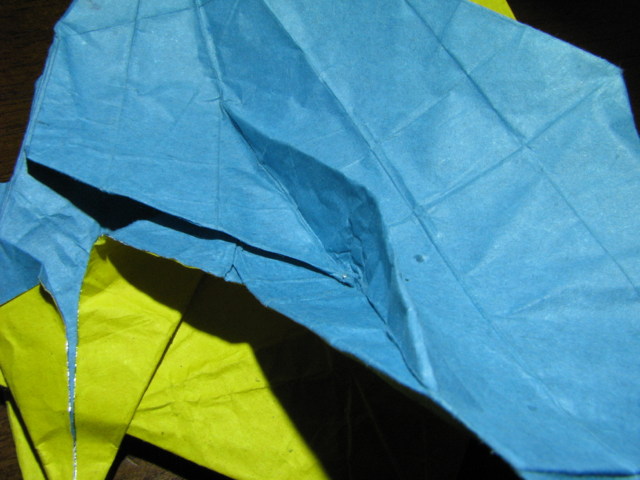
Step 55 can be kind of tricky depending on the paper you use. Take the right side and slide it over the left side, keeping the triangle on top on top. The end result will look sort of like this (which is spread apart so you can see the details):
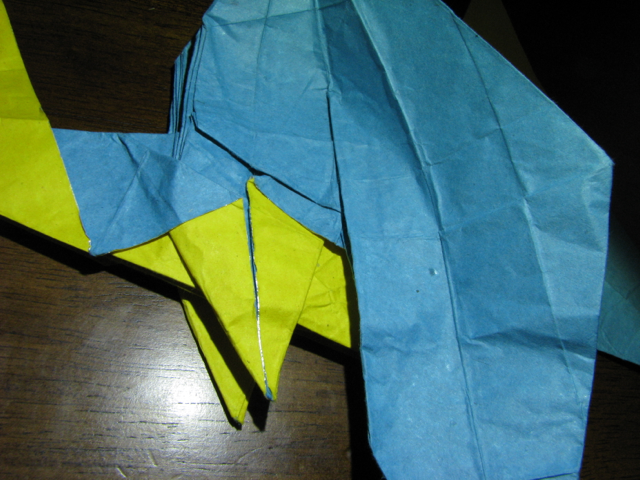
Step 56 is just folding the flap from 54 back underneath. This is what your triangle section should look like at this point:
Step 57 swings the left side of the small triangle up, flattening it.
Step 58 is another of those cursed closed sinks, which is to say, popping the large triangle inside the model without unfolding anything.

Step 59 then is simply folding the two flaps from 53 back over, closing the model back up.

Now you get to do it all over again on the other side! How exciting.
Hopefully this helps a little bit... Please ask if I confused you further or if you have any other questions. Have fun!
I updated the photos with a model you can see better from (except for step 51, I was past that when I realized I forgot them, and didn't want to unfold the model).
********
Cool...we'll work our way from 51 then. I apologize in advance for my crappy photos, please let me know if you need me to take them again with better lighting.
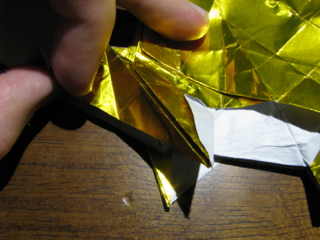
Step 51 is wrapping a single layer from behind the little leg there to the front, like this:
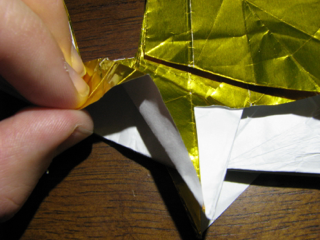
Step 52 creates an extra flap from the middle of the paper, like this:
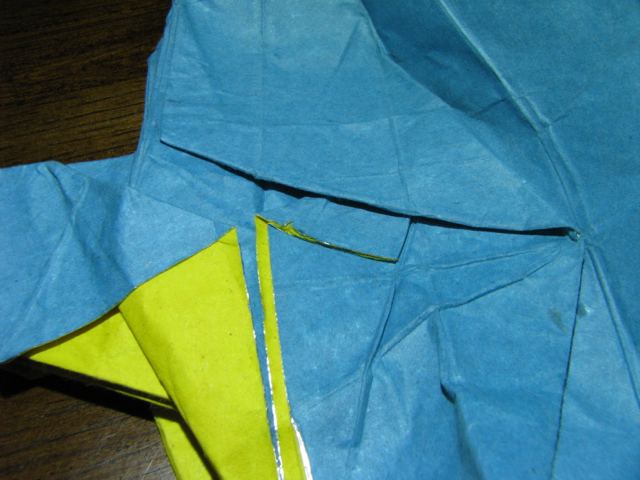
Step 53 folds the top two flaps over, and like it says, the model won't lie flat.
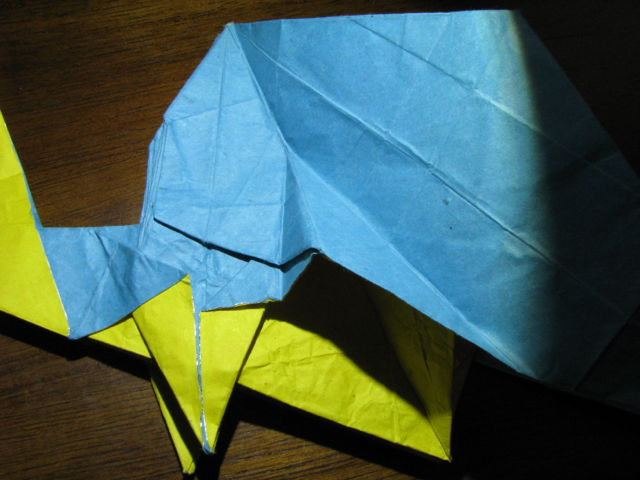
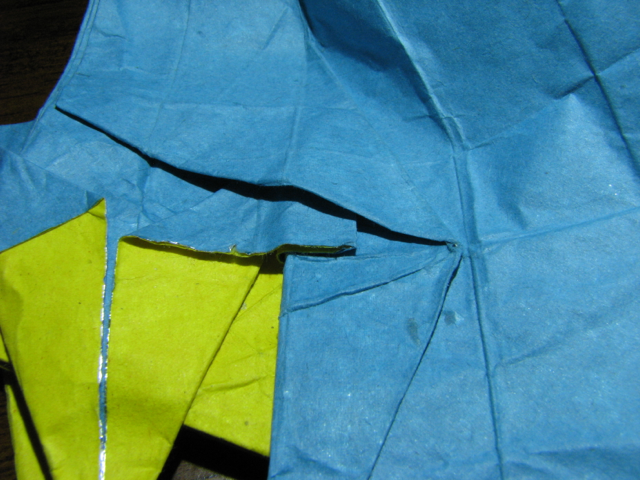
Step 54 is simply swiveling the bottom layer out from underneath. it won't lie flat, and don't reverse the direction, just let it hang there like this:
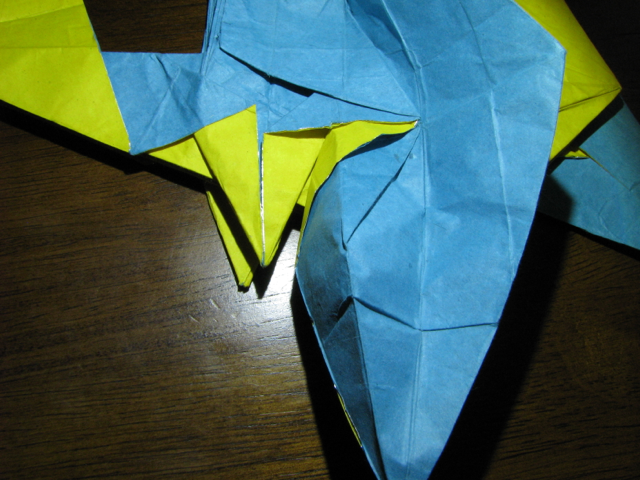
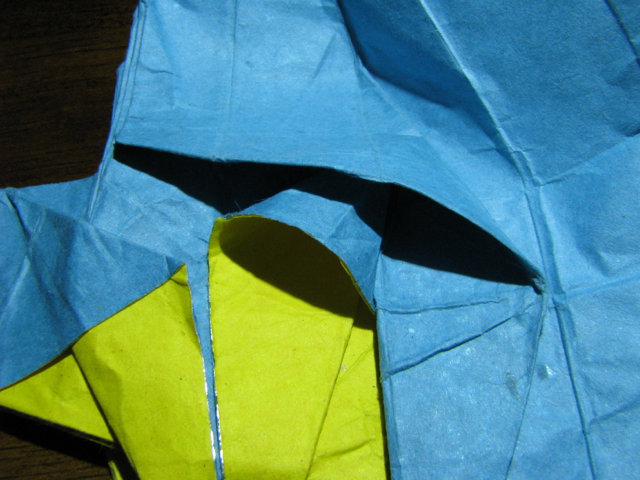
Step 55 can be kind of tricky depending on the paper you use. Take the right side and slide it over the left side, keeping the triangle on top on top. The end result will look sort of like this (which is spread apart so you can see the details):
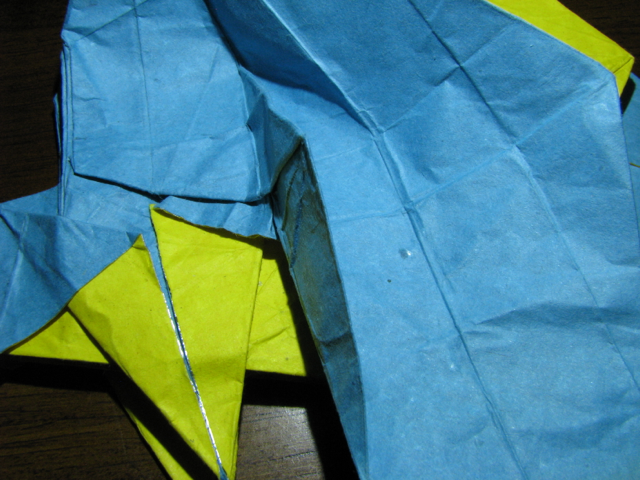
Step 56 is just folding the flap from 54 back underneath. This is what your triangle section should look like at this point:
Step 57 swings the left side of the small triangle up, flattening it.
Step 58 is another of those cursed closed sinks, which is to say, popping the large triangle inside the model without unfolding anything.
Step 59 then is simply folding the two flaps from 53 back over, closing the model back up.
Now you get to do it all over again on the other side! How exciting.
Hopefully this helps a little bit... Please ask if I confused you further or if you have any other questions. Have fun!
Last edited by oz on September 8th, 2011, 6:10 pm, edited 1 time in total.