Page 1 of 2
Robert Lang locust
Posted: January 2nd, 2011, 4:15 am
by awesomesplosion
I can't find the reference points for this locust. Can someone please help me
http://www.langorigami.com/art/insects/locust_cp.pdf
Posted: January 2nd, 2011, 4:21 am
by orislater
there are diagrams in origami tanteidan 11 i think.
and you will have to measure the references unless stacy saves us.
Posted: January 2nd, 2011, 4:22 am
by awesomesplosion
whos stacy
Posted: January 2nd, 2011, 4:24 am
by orislater
oops sorry.
his username is
Flaregloom and he's great with references
Posted: January 2nd, 2011, 4:24 am
by awesomesplosion
oh lol i hope he does because i cant buy anything
Posted: January 2nd, 2011, 6:23 am
by orislater
Like i said you can measure it. or print it out and test fold it while we wait for references. just so you know you can fold it

Posted: January 2nd, 2011, 9:24 am
by garrasdecaiman
I'm pretty convinced that the reference is (0.5,0.1939)
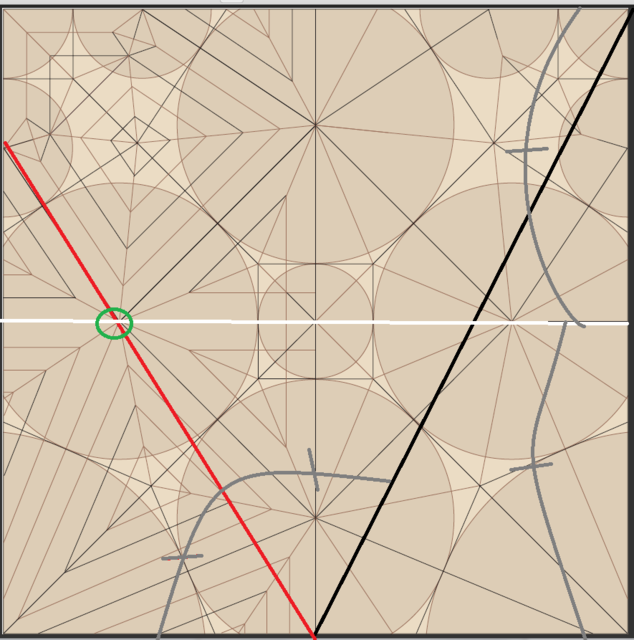
I tried to draw the diagram but I super suck!
the first line is supposed to be the top left corner to the bottom center, the second line is the angular bisection of the leftover angle and the reference point is where that line meets the parallel bisection of the square.
that's the green circle and is the reference to a modified bird base which appears to have some variation of the perfect split or the pentagonal gusset molcule.
My conviction spans from the simplicity of getting the reference since you only need to throw two lines and that it modifies the preexisting grasshopper structure of an earlier Lang design.
It appears to have the same construction as the grasshopper in insects and their kin with different references and a boxpleat like thinning not a bisectional one.
but study the grasshopper to get a feel of what's going on!
hope this helps
X
Posted: January 2nd, 2011, 10:18 am
by garrasdecaiman
Proof of concept!
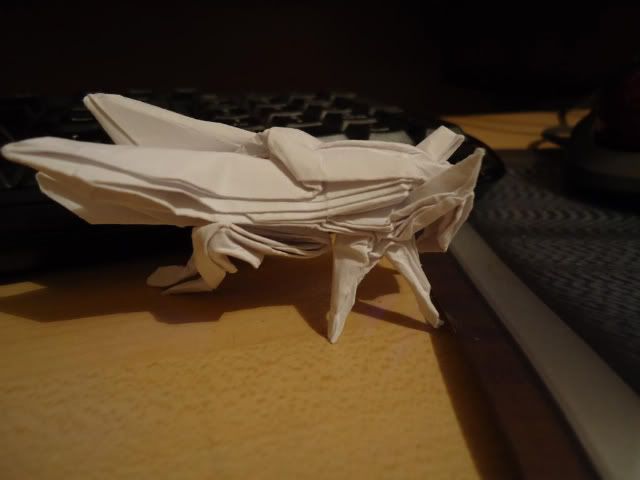
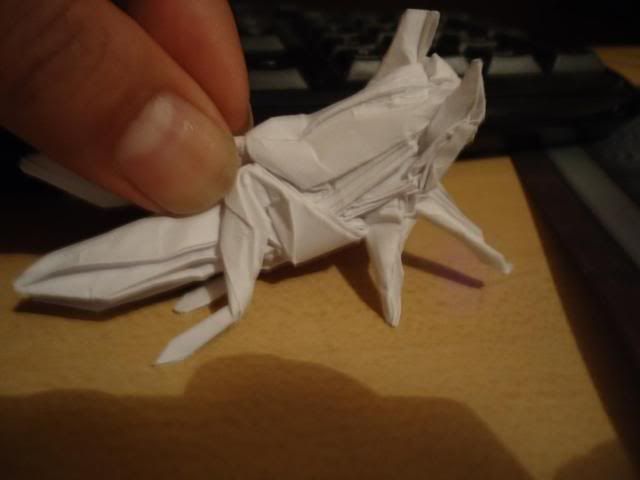
and the crease pattern
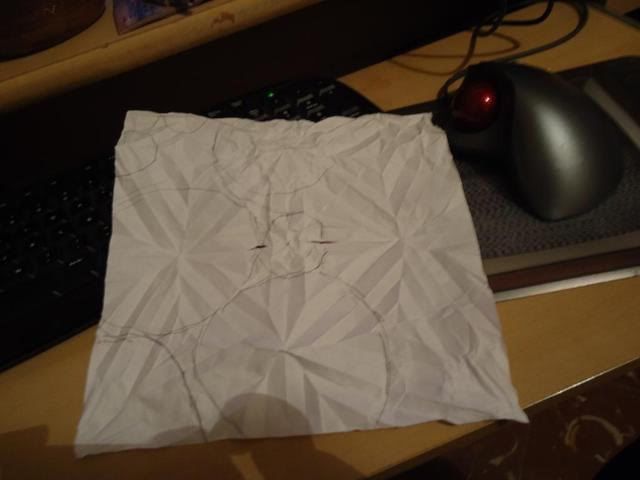
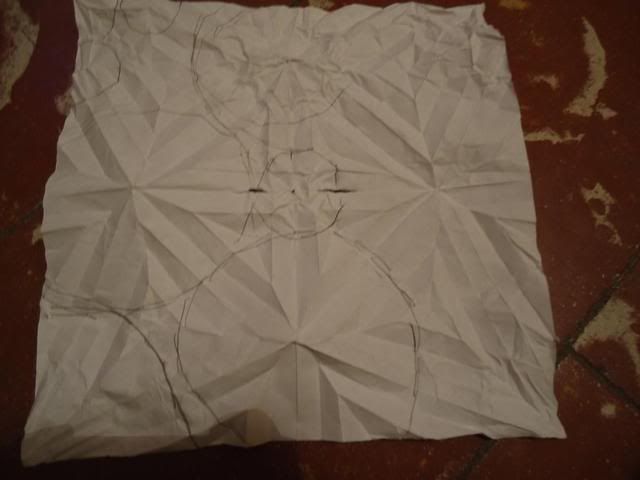
So I think it's not too difficult to obtain good results folding it again with better paper and more time but for now that should be enough to get you on track.
Hope this did help!
X
Moderator comment: Pictures exceeded 640x640 pixels and have therefore been changed into links.
Posted: January 2nd, 2011, 10:53 am
by origami_8
Please garrasdecaiman, resize your pictures to fit a 640 x 640 pixel square before uploading. Some picture hosting sites like flickr or imageshack also resize the pictures for you (on imageshack you have to choose the target size when uploading, flickr offers several sizes after uploading by default, the correct one for the Forum being _z).
Posted: January 2nd, 2011, 4:42 pm
by Trouble
i have the book and that referance is not correct
Posted: January 2nd, 2011, 9:32 pm
by garrasdecaiman
I have conviced my girlfrend to go to my house and get pictures of the diagrams from my book.
and the refrences are pretty close although yes the refrence point is not the same Mr Lang uses. in Mr Lang's model he uses a binary approach
touch top edge to center,
touch bottom edge to new crease which is 75% from the bottom
touch bottom edge to new crease which is now 35.5% from the bottom
final crease rests 18.75% from the bottom.
In my method the final crease rests 19.39% from the bottom and the difference of them is 0.64%
so if it is not the same reference the difference is minuscule, especially since the folding precision is maybe close to 1 mm which in a square from a letter size paper comes to .46%
Also using Mr Lang's method there is an inherent error since he folds the tip of the preliminary fold at once instead of laying each line out, so the thickness of the layers of paper can be expected to shift the edges for the internal bird base by more than the 0.46% difference, the front part of the fold will be very precise but the back part in which the fold is a mountain will have shifted down towards the edge of the paper.
Finally the model since it is filled with common molecules (for the tips a variation of a perfect split as I supposed) the lengths of the points will be slightly larger in my method especially if you fold from a large thin paper and mark the lines very accurately.
I hope you are satisfied with my answer.
X
Posted: January 2nd, 2011, 9:55 pm
by awesomesplosion
thank you everyone
Posted: January 4th, 2011, 5:58 am
by garrasdecaiman
since pictures are back in the "under the 600p" size rule I have rehabilitated them due to the edit button avilable to the user posts.
I hope this is not a breach of the rules!
Posted: January 4th, 2011, 6:15 pm
by origami_8
Great, that's far better. Thank you!
Posted: January 5th, 2011, 1:16 am
by Vkai
Guys i refolded it many times from step 12 to step 15 and i think i got it right but need to make sure before continuing.
Are all flaps at step 16 on the right or there should be one flap on the left and one on the right?? Or if im not clear should all flaps be next to each other??
Im not sure if in step there shouldnt be flap on the upper part? Because thats impossible to do:)
Thanks
Edit added photo

Is this correct?