How do you create a model of your own design?
Forum rules
READ: The Origami Forum Rules & Regulations
READ: The Origami Forum Rules & Regulations
-
klnothincomin

- Senior Member
- Posts: 256
- Joined: February 12th, 2008, 2:06 am
- Location: Alpharetta, GA
- Contact:
How do you create a model of your own design?
I have seen many poeple fold and create a model of their own design, and I was feeling that I should design a model myself as well. Can anyone who have created a model before give me some tips and tricks to help me begin?
Kevin Luo
If practice doesn't make perfect, at least it passes time! ^_^
If practice doesn't make perfect, at least it passes time! ^_^
-
GenghisKhan

- Newbie
- Posts: 17
- Joined: January 28th, 2008, 12:45 pm
- Location: Italy
Origami Design
I really suggest you to buy the wonderful book by Robert Lang "Origami Design Secrets", it contains its "bag of tricks" on how to design original models and explains how he managed to design many of his models.
Of course his techniques, focusing mainly on uniaxial bases, are just a fraction on the design of original models and many other great origamists have totally different approaches.
Of course his techniques, focusing mainly on uniaxial bases, are just a fraction on the design of original models and many other great origamists have totally different approaches.
-
JeossMayhem

- Forum Sensei
- Posts: 644
- Joined: October 1st, 2006, 8:02 am
- Location: Bellingham, Washington, USA
- Contact:
It took me half an eternity to come up with something that I was content with... a few months of alternating between giving up and starting where I left off. So first thing is, frustration is normal.
Second, get used to drawing CP's of your models. I made one for every draft, and stepping back and looking at it not only helped me understand what I was doing exactly and how I should adjust my proportions for flaps. And most importantly, you'll quickly remember how to fold your model and have a record just in case you forget.
Then, find a subject you're interested in and think about how you could fold it, or think about what you want to emphasize. For instance,I have been sticking with turtles or tortoises not just because they're my favorite animals, but because I want to create a shell pattern that looks life-like but strictly geometric at the same time.
I also second GenghisKhan's suggestion, though I haven't really studied with in in-depth yet. What I have learned from it has helped nonetheless. Use your experience to intelligently fold exactly the way you want to, and try to avoid randomness, not to say experimenting is bad. Good luck.
Check out my blog!
http://www.jeoss.wordpress.com
http://www.jeoss.wordpress.com
-
Gadi Vishne

- Junior Member
- Posts: 86
- Joined: November 6th, 2007, 3:58 pm
- Location: Israel
- Contact:
Re: Origami Design
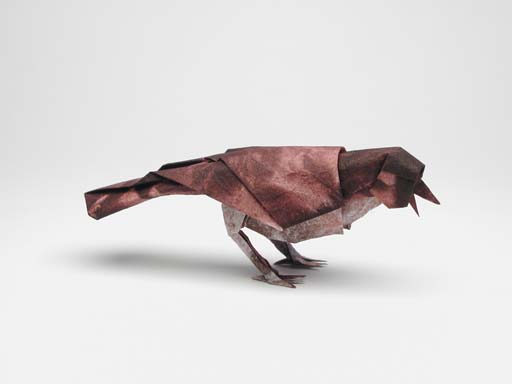
1. Fold a simple bird.
2. Mark the beak.
3. Unfold the bird.
4. Think: how can you add a beak to this bird.
add some paper? create more creases?
(Robert Lang solved it as: Song Bird I in "Origami Design Secrets")
5. Re-fold the bird with the improved beak.
If it satisfies you, try it on other objects.
If not, go back to step 4 and try again.
-
GenghisKhan
- Newbie
- Posts: 17
- Joined: January 28th, 2008, 12:45 pm
- Location: Italy
You have to proceed by degrees.
First times you can for sure use an existing base to realize something new.
Ex: take a frog base and think of something else that can be obtained from it. Or take Montroll's dog base and fold a new 4-legged animal from it.
Second step could be to alter the proportions of the base and obtain another one which could be suitable for other subjects.
Third step could be to apply point-splitting to known bases. Marc Kirschenbaum do this incredibly well, you can study his diagrams.
I think I will stop now, since I probably gave you origami work for the next three months.
-
klnothincomin
- Senior Member
- Posts: 256
- Joined: February 12th, 2008, 2:06 am
- Location: Alpharetta, GA
- Contact:

-
Finward

- Super Member
- Posts: 223
- Joined: December 7th, 2006, 1:01 am
- Location: In front of the computer
- Contact:
Ill tell you the way i created my first models, models than even today i like very much
1. Take a sheet of paper
2. Fold it
That's it!!!! sooner or later you'll came up with something. Just be patient and imaginative
1. Take a sheet of paper
2. Fold it
That's it!!!! sooner or later you'll came up with something. Just be patient and imaginative
Sebastian Arellano
https://www.facebook.com/OrigamiDesdeLerma
https://www.facebook.com/OrigamiDesdeLerma
-
Jonnycakes

- Buddha
- Posts: 1414
- Joined: June 14th, 2007, 8:25 pm
- Location: Ohio, USA
- Contact:
I have been designing for a few years now, and some of these suggestions may not be appropriate for the folder just beginning the design process, but here goes anyway:
1. ODS is a great starting point/reference for serious designing.
2. Fiddle around and experiment a lot, always pushing your boundaries-I find that this is how I learn fastest.
3. Eventually, you will develop a mental "library of parts" (I think that's what Kamiya calls it ). By that I mean that you will know ways to make certain parts of animals/people/objects and how they look as creases on a flat sheet of paper. You will be able to stick these parts together into a full, coherent model as you gain more experience (I am kind of just getting into this). A combination of old tricks and new design techniques creates the most interesting models, I think.
4. If you are having trouble with a specific part of a model (CP, your own design, whatever), then take another piece of paper and fold just that small part of the model. Say you are having trouble folding the arm of a person: fold just the arm from a separate square and it will be bigger and easier to work with-then you can integrate it into the full model. I got this idea from Kawasaki's Roses, Origami & Math, and it really helps. Sometimes I start a model by just folding a smaller part and building up from there.
Well, my tips have grown progressively bigger and I have already said more than I originally intended to, so I will give your eyes a rest (if you made it this far ).
Good luck with your designing!
1. ODS is a great starting point/reference for serious designing.
2. Fiddle around and experiment a lot, always pushing your boundaries-I find that this is how I learn fastest.
3. Eventually, you will develop a mental "library of parts" (I think that's what Kamiya calls it
4. If you are having trouble with a specific part of a model (CP, your own design, whatever), then take another piece of paper and fold just that small part of the model. Say you are having trouble folding the arm of a person: fold just the arm from a separate square and it will be bigger and easier to work with-then you can integrate it into the full model. I got this idea from Kawasaki's Roses, Origami & Math, and it really helps. Sometimes I start a model by just folding a smaller part and building up from there.
Well, my tips have grown progressively bigger and I have already said more than I originally intended to, so I will give your eyes a rest (if you made it this far
Good luck with your designing!
-
aesthetistician

- Junior Member
- Posts: 66
- Joined: March 1st, 2007, 8:47 pm

You might find this helpful. Its a bit dated, but may be useful...
http://www.fishgoth.com/origami/essay_designing1.html
http://www.fishgoth.com/origami/essay_designing1.html
I once set up an origami PLC. But the business folded.
-
quesoonfire

- Super Member
- Posts: 130
- Joined: August 20th, 2007, 2:52 am
- Location: by the computer....
- Contact:
-
klnothincomin
- Senior Member
- Posts: 256
- Joined: February 12th, 2008, 2:06 am
- Location: Alpharetta, GA
- Contact:
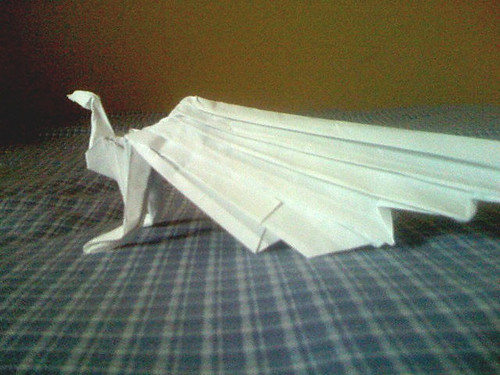
Thanks for all the advice, I have come up with a simple model, though the legs and head need more work. I need to add claws on the back hind fins and details like scales or spikes.
Loch Ness Monster
[img]http://i247.photobucket.com/albums/gg16 ... omin/1.jpg[/img]
[img]http://i247.photobucket.com/albums/gg16 ... omin/2.jpg[/img]
[img]http://i247.photobucket.com/albums/gg16 ... in/3-1.jpg[/img]
Here is the CP
[img]http://i247.photobucket.com/albums/gg16 ... n/loch.jpg[/img]
Loch Ness Monster
[img]http://i247.photobucket.com/albums/gg16 ... omin/1.jpg[/img]
[img]http://i247.photobucket.com/albums/gg16 ... omin/2.jpg[/img]
[img]http://i247.photobucket.com/albums/gg16 ... in/3-1.jpg[/img]
Here is the CP
[img]http://i247.photobucket.com/albums/gg16 ... n/loch.jpg[/img]
Kevin Luo
If practice doesn't make perfect, at least it passes time! ^_^
If practice doesn't make perfect, at least it passes time! ^_^
-
klnothincomin
- Senior Member
- Posts: 256
- Joined: February 12th, 2008, 2:06 am
- Location: Alpharetta, GA
- Contact:
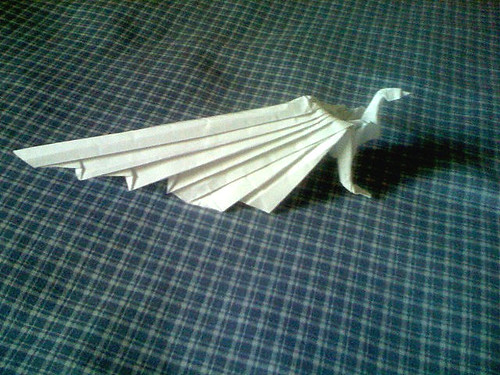
Here is my second design, I folded a peacock with closed tail feathers. It is still incomplete, for I want to add toes and wings. I also want to design one with the tail feathers spread open, tho show the true beauty and majesty of a peacock. 
Kevin Luo
If practice doesn't make perfect, at least it passes time! ^_^
If practice doesn't make perfect, at least it passes time! ^_^